Local Kubernetes Cluster on KVM
I wanted to explore kubernetes even more for myself and for this blog. I’ve worked on pieces of this at work but not the totality of the work which I would like to understand for myself. I wanted, also to explore new tools and ways to leverage the power of kubernetes.
So far, I have been using minikube to do the deployments but there is an inherit restriction that comes with using a single bundled node. Sure, it is easy to get it up and running but at some point I had to use nodePort to go around the IP restriction. This is a restriction that you will have in an actual kubernetes cluster but I will show you later how to go around it. For now, let’s just get a local cluster up and running.
Objective
I needed a local kubernetes cluster using all open source tools and easy to deploy. So I went with using KVM as the hypervisor layer and installed virt-manager for shallow management. As an OS, I wanted something light and made for kubernetes. As I already know of Rancher (being an easy way to deploy kubernetes and they have done a great job so far since the launch of their Rancer 2.0) I decided to try RancherOS. So let’s see how all that works together.
Requirements
Let’s start by thinking about what we actually need. Rancher, the dashboard they offer is going to need a VM by itself and they recommend 4GB of RAM. I only have 16GB of RAM on my machine so I’ll have to do the math to see how much I can afford to give this dashboard and manager. By looking at the RancherOS hardware requirements, I can tell that by giving a each node 2GB of RAM I should be able to host a 3 node cluster and with 2 more for the dashboard that puts me right on 8GB of RAM. So we need to create 4 VMs with 2GB of RAM each.
Installing RancherOS
Once all 4 nodes have been created, when you boot into the RancherOS ISO do the following.
Note
Because I was using libvirt, I was able to do virsh console <vm> and run these commands.
Virsh Console
If you are running these VMs on libvirt, then you can console into the box and run vi.
 # virsh list
 Id   Name      State
 -------------------------
 21   kube01    running
 22   kube02    running
 23   kube03    running
 24   rancher   running

 # virsh console rancher
Configuration
If you read the RancherOS documentation, you’ll find out that you can configure the OS with a YAML configuration file so let’s do that.
$ vi cloud-config.yml
And that file should hold.
---
hostname: rancher.kube.loco
ssh_authorized_keys:
  - ssh-rsa AAA...
rancher:
  network:
    interfaces:
      eth0:
        address: 192.168.122.5/24
        dhcp: false
        gateway: 192.168.122.1
        mtu: 1500
Make sure that your public ssh key is replaced in the example before and if you have a different network configuration for your VMs, change the network configuration here.
After you save that file, install the OS.
$ sudo ros install -c cloud-config.yml -d /dev/sda
Do the same for the rest of the servers and their names and IPs should be as follows (if you are following this tutorial):
 192.168.122.5   rancher.kube.loco
 192.168.122.10  kube01.kube.loco
 192.168.122.11  kube02.kube.loco
 192.168.122.12  kube03.kube.loco
Post Installation Configuration
After RancherOS has been installed, one will need to configure /etc/hosts and it should look like the following if one is working off of the Rancher box.
$ sudo vi /etc/hosts
 127.0.0.1       rancher.kube.loco
 192.168.122.5   rancher.kube.loco
 192.168.122.10  kube01.kube.loco
 192.168.122.11  kube02.kube.loco
 192.168.122.12  kube03.kube.loco
Do the same on the rest of the servers while changing the 127.0.0.1 hostname to the host of the server.
Installing Rancher
At this point, I have to stress a few facts:
- This is not the Rancher recommended way to deploy kubernetes.
- The recommended way is of course RKE.
- This is for testing, so I did not take into consideration backup of anything.
- There are ways to backup Rancher configuration by mounting storage from the
rancherdocker container.
- There are ways to backup Rancher configuration by mounting storage from the
If those points are understood, let’s go ahead and deploy Rancher.
First, $ ssh [email protected] then:
[rancher@rancher ~]$ docker run -d --restart=unless-stopped -p 80:80 -p 443:443 rancher/rancher
Give it a few minutes for the container to come up and the application as well. Meanwhile configure your /etc/hosts file on your machine.
192.168.122.5 rancher.kube.loco
Now that all that is out of the way, you can login to https://rancher.kube.loco and set your admin password and the url for Rancher.
Deploying Kubernetes
Now that everything is ready, let’s deploy kubernetes the easy way.
At this point you should be greeted with a page that looks like the following.
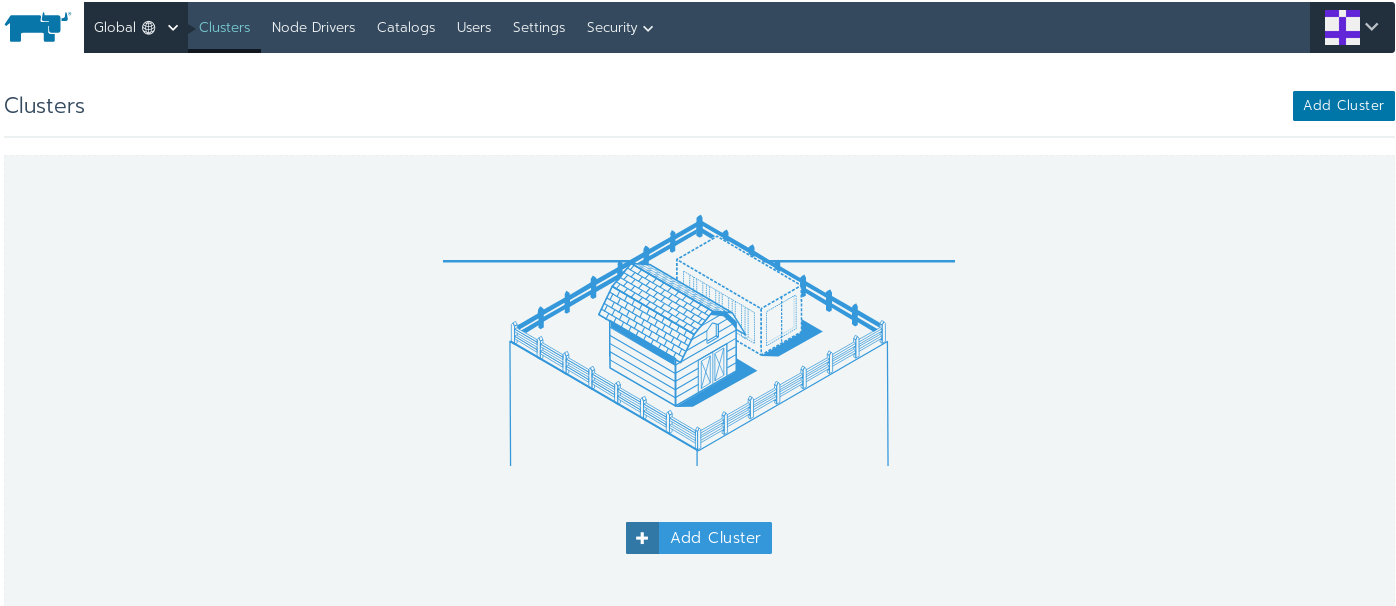
Figure 1: Add Cluster Page
Click on the Add Cluser
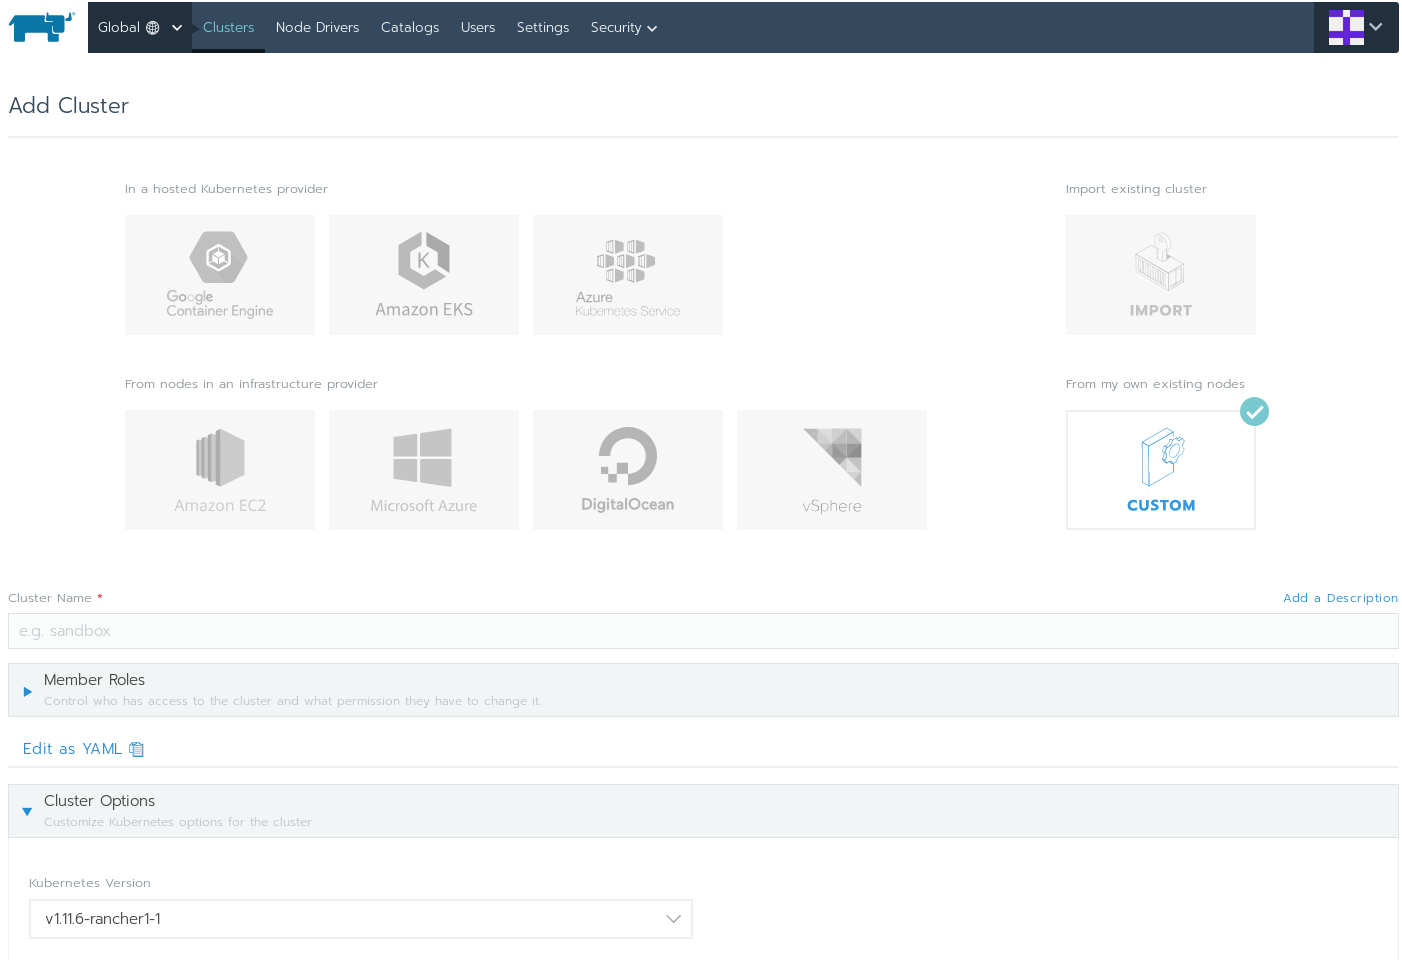
Figure 2: Custom Cluster Page
Make sure you choose Custom as a provider. Then fill in the Cluser Name in our case we’ll call it kube.
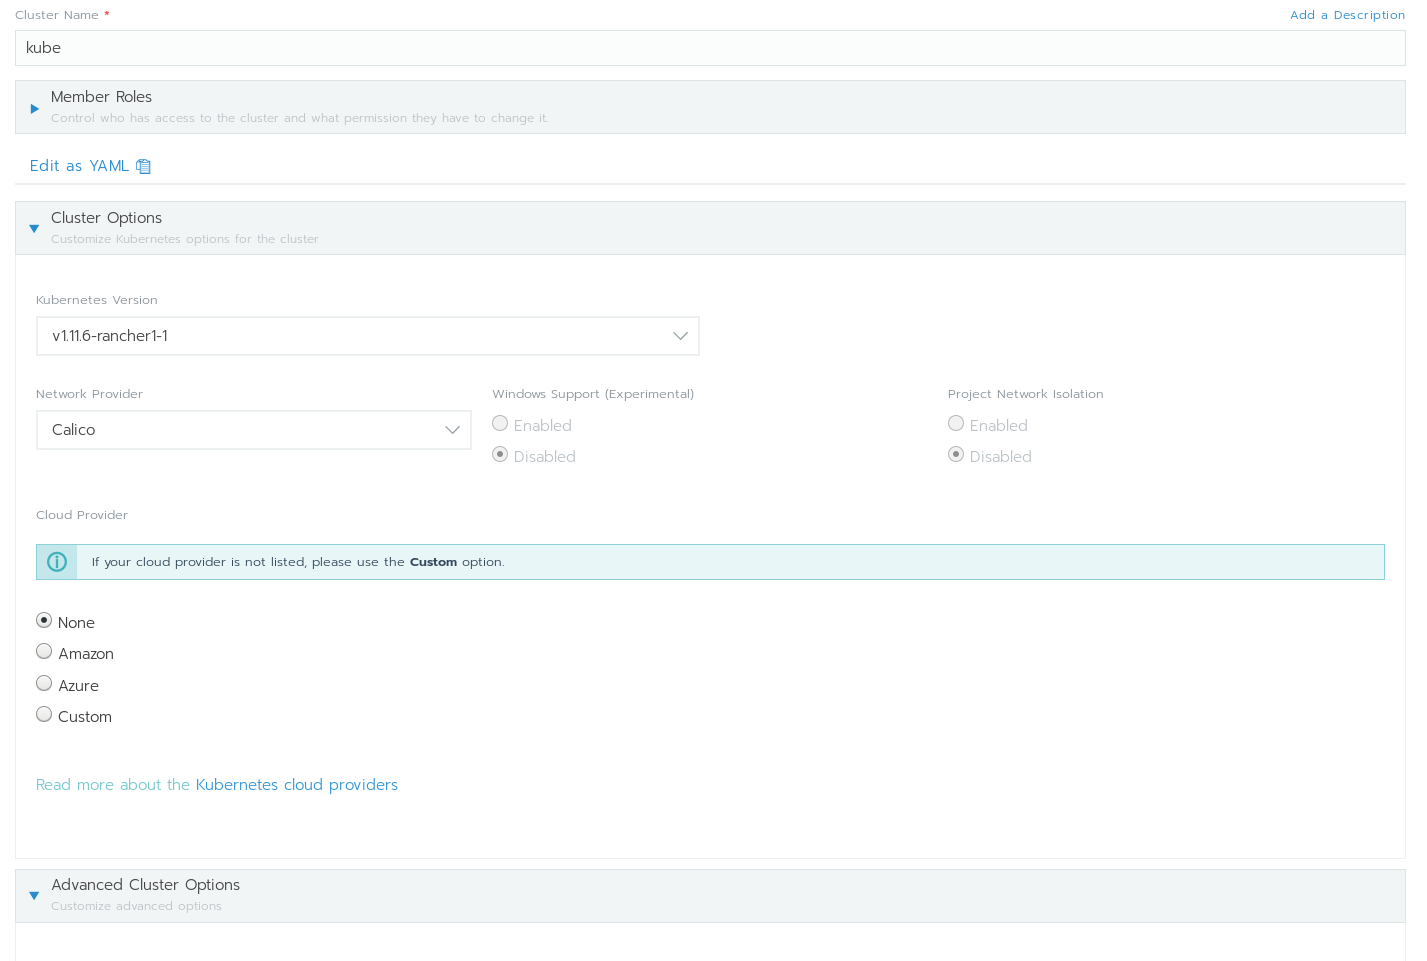
Figure 3: Network Provider: Calico (Optional)
Optionally, you can choose your Network Providor, in my case I chose Calico. Then I clicked on show advanced at the bottom right corner then expanded the newly shown tab Advanced Cluster Options.
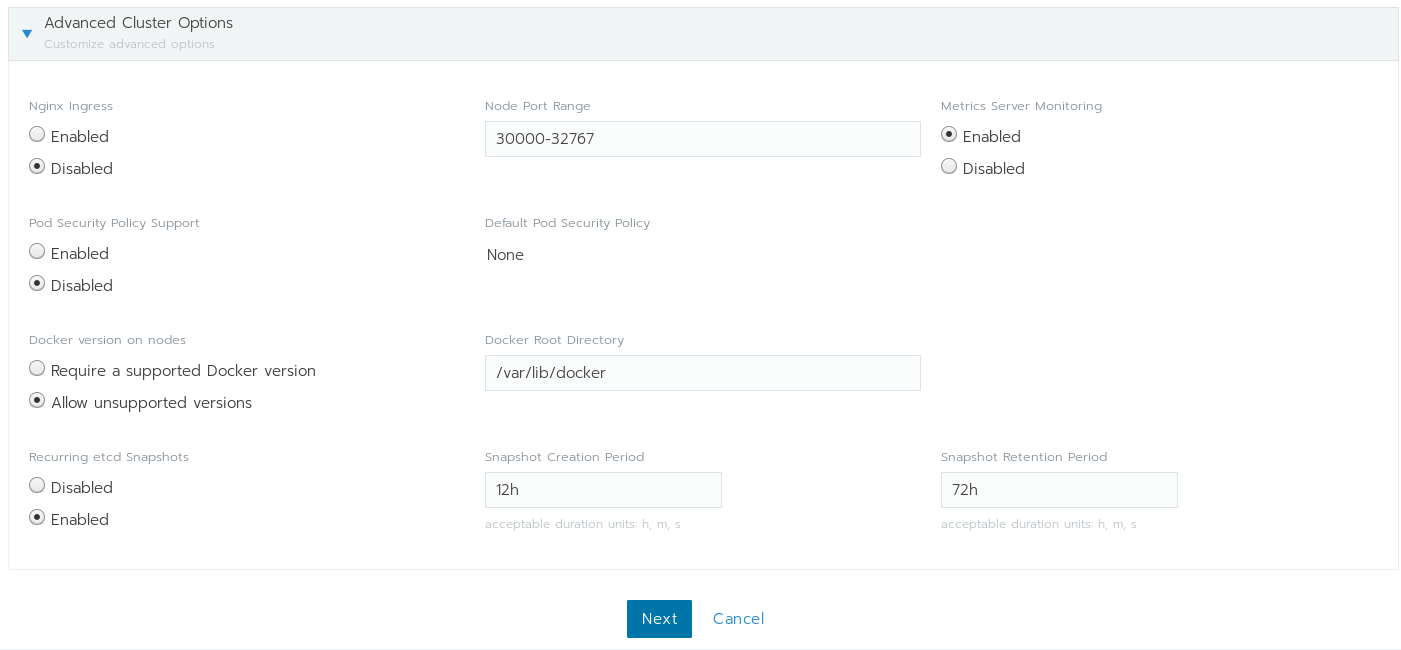
Figure 4: Nginx Ingress Disabled
We will disable the Nginx Ingress and the Pod Security Policy Support for the time being. This will become more apparent why in the future, hopefully. Then hit Next.
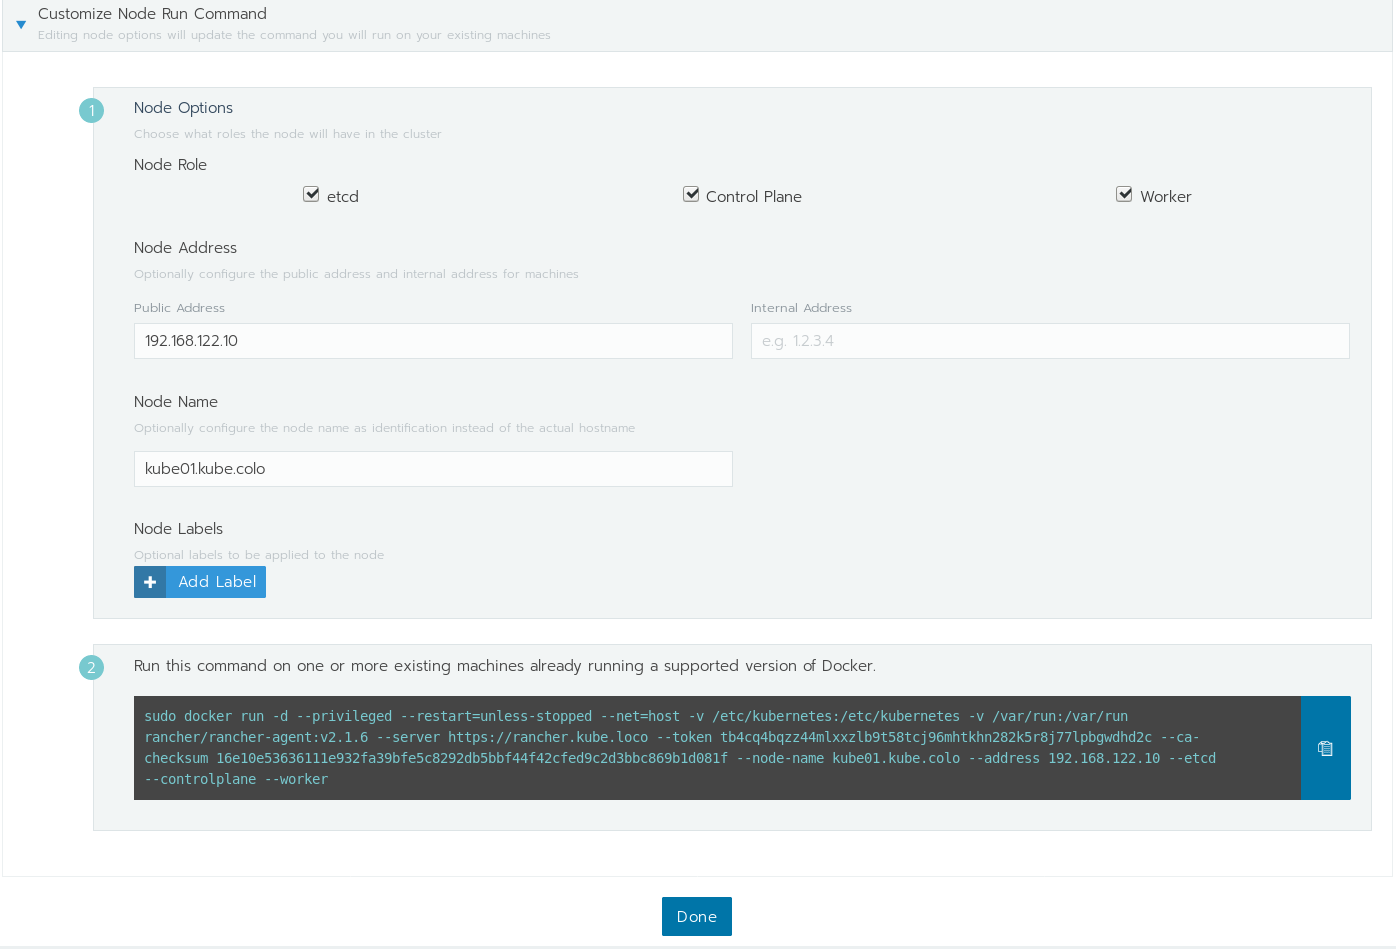
Figure 5: Customize Nodes
Make sure that you select all 3 Node Roles. Set the Public Address and the Node Name to the first node and then copy the command and paste it on the first node.
Do the same for all the rest. Once the first docker image gets downloaded and ran you should see a message pop at the bottom.
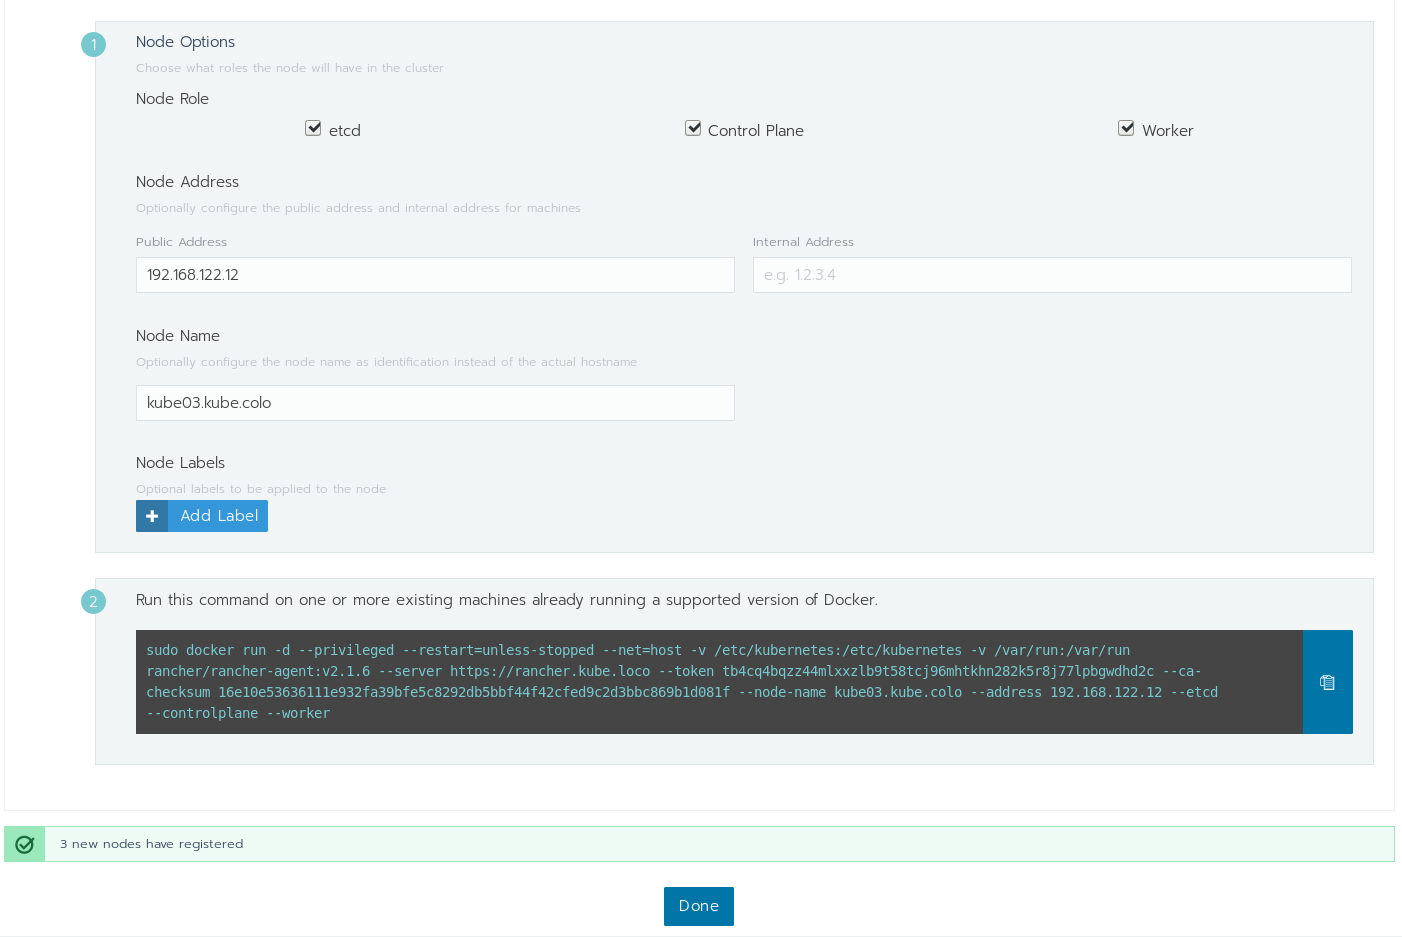
Figure 6: Registered Nodes
warning
Do NOT click done until you see all 3 nodes registered.
Finalizing
Now that you have 3 registered nodes, click Done and go grab yourself a cup of coffee. Maybe take a long walk, this will take time. Or if you are curious like me, you’d be looking at the logs, checking the containers in a quad pane tmux session.
After a long time has passed, our story ends with a refresh and a welcome with this page.
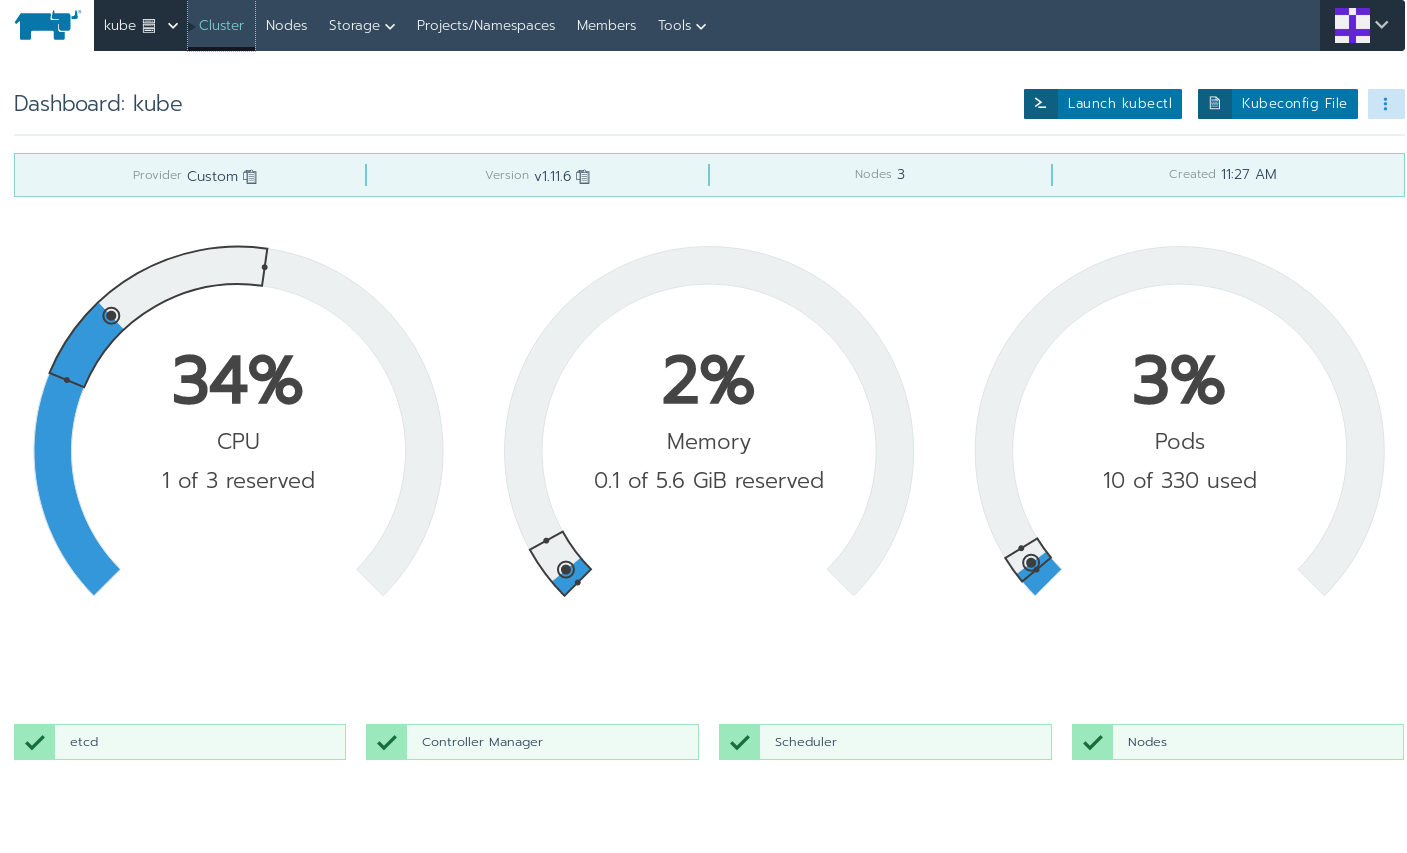
Figure 7: Kubernetes Cluster
Welcome to your Kubernetes Cluster.
Conclusion
At this point, you can check that all the nodes are healthy and you got yourself a kubernetes cluster. In future blog posts we will explore an avenue to deploy multiple ingress controllers on the same cluster on the same port: 80 by giving them each an IP external to the cluster.
But for now, you got yourself a kubernetes cluster to play with. Enjoy.