Linux Containers
Our story dates all the way back to 2006, believe it or not. The first steps were taken towards what we know today as containers. We’ll discuss their history, how to build them and how to use them. Stick around! you might enjoy the ride.
History
2006-2007 - The Generic Process Containers lands in Linux
This was renamed thereafter to Control Groups, popularily known as cgroups, and landed in Linux version 2.6.24.
Cgroups are the first piece of the puzzle in Linux Containers. We will be talking about cgroups in detail later.
2008 - Namespaces
Even though namespaces have been around since 2002, Linux version 2.4.19, they saw a rapid development beginning 2006 and into 2008.
namespaces are the other piece of the puzzle in Linux Containers. We will talk about namespaces in more details later.
2008 - LXC
LXC finally shows up!
LXC is the first form of containers on the Linux kernel. LXC combined both cgroups and namespaces to provide isolated environments; containers.
Note
It is worth mentioning that LXC runs a full operating system containers from an image. In other words, LXC containers are meant to run more than one process.
2013 - Docker
Docker offered a full set of tools for working with containers, making it easier than ever to work with them.
Docker containers are designed to only run the application process.
Unlike LXC, the PID 1 of a Docker container is excepted to be the application running in the contanier.
We will be discussing this topic in more detail later.
Concepts
cgroups
What are cgroups ?
Let’s find out ! Better yet, let’s use the tools at our disposal to find out together…
Open a terminal and run the following command.
man 7 cgroups
This should open the man pages for cgroups.
Control groups, usually referred to as cgroups, are a Linux kernel feature which allow processes to be organized into hierarchical groups whose usage of various types of resources can then be limited and monitored. The kernel’s cgroup interface is provided through a pseudo-filesystem called cgroupfs. Grouping is implemented in the core cgroup kernel code, while resource tracking and limits are implemented in a set of per-resource-type subsystems (memory, CPU, and so on).
What does this all mean ?
This can all be simplified by explaining it in a different way.
Essentially, you can think of cgroups as a way for the kernel to limit what you can use.
This gives us the ability to give a container only 1 CPU out of the 4 available to the kernel. Or maybe, limit the memory allowed to 512MB to the container. This way the container cannot overload the resources of the system in case they run a fork-bomb, for example.
But, cgroups do not limit what we can “see”.
namespaces
Namespaces to the rescue !
As we did before, let’s check the man page for namespaces
man 7 namespaces
A namespace wraps a global system resource in an abstraction that makes it appear to the processes within the namespace that they have their own isolated instance of the global resource. Changes to the global resource are visible to other processes that are members of the namespace, but are invisible to other processes. One use of namespaces is to implement containers.
Wooow ! That’s more mumbo jumbo ?!
Is it really simple ?
Let’s simplify this one as well.
You can think of namespaces as a way for the kernel to limit what we see.
There are multiple namespaces, like the cgroup_namespaces which virtualizes the view of a process cgroup.
In other words, inside the cgroup the process with PID 1 is not PID on the system.
The namespaces manual page lists them, you check them out for more details. But I hope you get the gist of it !
Linux Containers
We are finally here! Let’s talk Linux Containers.
The first topic we need to know about is images.
What are container images ?
We talked before that Docker came in and offered tooling around containers.
One of those concepts which they used, in docker images, is layers.
First of all, an image is a file-system representation of a container. It is an on-disk, read-only, image. It sort of looks like your Linux filesystem.
Then, layers on top to add functionality. You might ask, what are these layers. We will see them in action.
Let’s look at my system.
lsb_release -a
LSB Version:	n/a
Distributor ID:	ManjaroLinux
Description:	Manjaro Linux
Release:	20.2.1
Codename:	Nibia
As you can see, I am running Manjaro. Keep that in mind.
Let’s take a look at the kernel running on this machine.
uname -a
Linux manjaro 5.10.15-1-MANJARO #1 SMP PREEMPT Wed Feb 10 10:42:47 UTC 2021 x86_64 GNU/Linux
So, it’s kernel version 5.8.6. Remember this one as well.
neofetch
I would like to test a tool called
neofetch. Why ?- First reason, I am not that creative.
- Second, it’s a nice tool, you’ll see.
We can test
neofetchneofetchfish: Unknown command: neofetchLook at that! We don’t have it installed… Not a big deal. We can download an image and test it inside.
Pulling an image
Let’s download a docker image. I am using podman, an open source project that allows us to use containers.
Note
You might want to run these commands with sudo privileges.
podman pull ubuntu:20.04
f63181f19b2fe819156dcb068b3b5bc036820bec7014c5f77277cfa341d4cb5e
Let’s pull an Ubuntu image.
As you can see, we have pulled an image from the repositories online. We can see further information about the image.
podman images
REPOSITORY                TAG     IMAGE ID      CREATED      SIZE
docker.io/library/ubuntu  20.04   f63181f19b2f  5 weeks ago  75.3 MB
Much better, now we can see that we have an Ubuntu image downloaded from docker.io.
What’s a container then ?
A container is nothing more than an instance of an image. It is the running instance of an image.
Let’s list our containers.
podman ps -a
CONTAINER ID IMAGE COMMAND CREATED STATUS PORTS NAMES
We have none. Let’s start one.
podman run -it ubuntu:20.04 uname -a
Linux 57453b419a43 5.10.15-1-MANJARO #1 SMP PREEMPT Wed Feb 10 10:42:47 UTC 2021 x86_64 x86_64 x86_64 GNU/Linux
It’s running the same kernel as our machine… Are we really inside a container ?
podman run -it ubuntu:20.04 hostname -f
6795b85eeb50
okay ?! And our hostname is ?
hostname -f
manjaro
Hmm… They have different hostnames…
Let’s see if it’s really Ubuntu.
podman run -it ubuntu:20.04 bash -c 'apt-get update && apt-get install -y vim'
Get:1 http://archive.ubuntu.com/ubuntu focal InRelease [265 kB]
Get:2 http://archive.ubuntu.com/ubuntu focal-updates InRelease [114 kB]
Get:3 http://archive.ubuntu.com/ubuntu focal-backports InRelease [101 kB]
Get:4 http://security.ubuntu.com/ubuntu focal-security InRelease [109 kB]
Get:5 http://archive.ubuntu.com/ubuntu focal/restricted amd64 Packages [33.4 kB]
Get:6 http://archive.ubuntu.com/ubuntu focal/multiverse amd64 Packages [177 kB]
Get:7 http://archive.ubuntu.com/ubuntu focal/universe amd64 Packages [11.3 MB]
...
Setting up libpython3.8:amd64 (3.8.5-1~20.04.2) ...
Setting up vim (2:8.1.2269-1ubuntu5) ...
update-alternatives: using /usr/bin/vim.basic to provide /usr/bin/vim (vim) in auto mode
update-alternatives: using /usr/bin/vim.basic to provide /usr/bin/vimdiff (vimdiff) in auto mode
update-alternatives: using /usr/bin/vim.basic to provide /usr/bin/rvim (rvim) in auto mode
update-alternatives: using /usr/bin/vim.basic to provide /usr/bin/rview (rview) in auto mode
update-alternatives: using /usr/bin/vim.basic to provide /usr/bin/vi (vi) in auto mode
...
update-alternatives: using /usr/bin/vim.basic to provide /usr/bin/editor (editor) in auto mode
...
Processing triggers for libc-bin (2.31-0ubuntu9.1) ...
This should not work on my Manjaro. apt-get is not a thing here.
Well, the output is a bit large so I truncated it a bit for readability but we seem to have installed vim successfully.
Building a container image
Now that we saw what an image is and what a container is. We can explore a bit inside a container to see it more clearly.
So, what can we do with containers? We can use the layering system and the docker created tooling to create them and distribute them.
Let’s go back to our neofetch example.
I want to get an Ubuntu image, then install neofetch on it.
First step, create a Dockerfile in your current directory. It should look like this.
FROM ubuntu:20.04

RUN apt-get update && \
    apt-get install -y neofetch
This file has two commands:
FROMdesignates the base image to use. This is the base image we will be building upon. In our case, we choseUbuntu:20.04. You can find the images on multiple platforms. To mention a few, we have Dockerhub, Quay.io and a few others.By default, this downloads from Dockerhub.
RUNdesignates the commands to run. Pretty simple. We are running a couple of commands that should be very familiar to any user familiar with debian-based OS’s.
Now that we have a Dockerfile, we can build the container.
podman build -t neofetch-ubuntu:20.04 -f Dockerfile.ubuntu .
STEP 1: FROM ubuntu:20.04
STEP 2: RUN apt-get update &&     apt-get install -y neofetch
Get:1 http://archive.ubuntu.com/ubuntu focal InRelease [265 kB]
Get:2 http://security.ubuntu.com/ubuntu focal-security InRelease [109 kB]
Get:3 http://archive.ubuntu.com/ubuntu focal-updates InRelease [114 kB]
...
Fetched 17.2 MB in 2s (7860 kB/s)
Reading package lists...
...
The following additional packages will be installed:
  chafa dbus fontconfig-config fonts-dejavu-core fonts-droid-fallback
  fonts-noto-mono fonts-urw-base35 ghostscript gsfonts imagemagick-6-common
  krb5-locales libapparmor1 libavahi-client3 libavahi-common-data
  libavahi-common3 libbsd0 libchafa0 libcups2 libdbus-1-3 libexpat1
  libfftw3-double3 libfontconfig1 libfreetype6 libglib2.0-0 libglib2.0-data
  libgomp1 libgs9 libgs9-common libgssapi-krb5-2 libicu66 libidn11 libijs-0.35
  libjbig0 libjbig2dec0 libjpeg-turbo8 libjpeg8 libk5crypto3 libkeyutils1
  libkrb5-3 libkrb5support0 liblcms2-2 liblqr-1-0 libltdl7
  libmagickcore-6.q16-6 libmagickwand-6.q16-6 libopenjp2-7 libpaper-utils
  libpaper1 libpng16-16 libssl1.1 libtiff5 libwebp6 libwebpmux3 libx11-6
  libx11-data libxau6 libxcb1 libxdmcp6 libxext6 libxml2 poppler-data
  shared-mime-info tzdata ucf xdg-user-dirs
Suggested packages:
  default-dbus-session-bus | dbus-session-bus fonts-noto fonts-freefont-otf
  | fonts-freefont-ttf fonts-texgyre ghostscript-x cups-common libfftw3-bin
  libfftw3-dev krb5-doc krb5-user liblcms2-utils libmagickcore-6.q16-6-extra
  poppler-utils fonts-japanese-mincho | fonts-ipafont-mincho
  fonts-japanese-gothic | fonts-ipafont-gothic fonts-arphic-ukai
  fonts-arphic-uming fonts-nanum
The following NEW packages will be installed:
  chafa dbus fontconfig-config fonts-dejavu-core fonts-droid-fallback
  fonts-noto-mono fonts-urw-base35 ghostscript gsfonts imagemagick-6-common
  krb5-locales libapparmor1 libavahi-client3 libavahi-common-data
  libavahi-common3 libbsd0 libchafa0 libcups2 libdbus-1-3 libexpat1
  libfftw3-double3 libfontconfig1 libfreetype6 libglib2.0-0 libglib2.0-data
  libgomp1 libgs9 libgs9-common libgssapi-krb5-2 libicu66 libidn11 libijs-0.35
  libjbig0 libjbig2dec0 libjpeg-turbo8 libjpeg8 libk5crypto3 libkeyutils1
  libkrb5-3 libkrb5support0 liblcms2-2 liblqr-1-0 libltdl7
  libmagickcore-6.q16-6 libmagickwand-6.q16-6 libopenjp2-7 libpaper-utils
  libpaper1 libpng16-16 libssl1.1 libtiff5 libwebp6 libwebpmux3 libx11-6
  libx11-data libxau6 libxcb1 libxdmcp6 libxext6 libxml2 neofetch poppler-data
  shared-mime-info tzdata ucf xdg-user-dirs
0 upgraded, 66 newly installed, 0 to remove and 6 not upgraded.
Need to get 36.2 MB of archives.
After this operation, 136 MB of additional disk space will be used.
Get:1 http://archive.ubuntu.com/ubuntu focal/main amd64 fonts-droid-fallback all 1:6.0.1r16-1.1 [1805 kB]
...
Get:66 http://archive.ubuntu.com/ubuntu focal/universe amd64 neofetch all 7.0.0-1 [77.5 kB]
Fetched 36.2 MB in 2s (22.1 MB/s)
...
Setting up ghostscript (9.50~dfsg-5ubuntu4.2) ...
Processing triggers for libc-bin (2.31-0ubuntu9.1) ...
STEP 3: COMMIT neofetch-ubuntu:20.04
--> 6486fa42efe
6486fa42efe5df4f761f4062d4986b7ec60b14d9d99d92d2aff2c26da61d13af
Note
You might need sudo to run this command.
As you can see, we just successfully built the container. We also got a hash as a name for it.
If you were careful, I used the && command instead of using multiple RUN. You can use as many RUN commands ase you like.
But be careful, each one of those commands creates a layer. The more layers you create, the more time they require to download*/*upload.
It might not seem to be a lot of time to download a few extra layer on one system. But if we talk about container orchestration platforms, it makes a big difference there.
Let’s examine the build a bit more and see what we got.
STEP 1: FROM ubuntu:20.04
STEP 2: RUN apt-get update &&     apt-get install -y neofetch
The first step was to download the base image so we could use it, then we added a layer which insatlled neofetch. If we list our images.
podman images
REPOSITORY                 TAG     IMAGE ID      CREATED        SIZE
localhost/neofetch-ubuntu  20.04   6486fa42efe5  5 minutes ago  241 MB
docker.io/library/ubuntu   20.04   f63181f19b2f  5 weeks ago    75.3 MB
We can see that we have localhost/neofetch-ubuntu. If we examine the ID, we can see that it is the same as the one given to us at the end of the build.
Running our container
Now that we created a brand-spanking-new image, we can run it.
podman images
REPOSITORY                 TAG     IMAGE ID      CREATED        SIZE
localhost/neofetch-ubuntu  20.04   6486fa42efe5  6 minutes ago  241 MB
docker.io/library/ubuntu   20.04   f63181f19b2f  5 weeks ago    75.3 MB
First we list our images. Then we choose which one to run.
podman run -it neofetch-ubuntu:20.04 neofetch
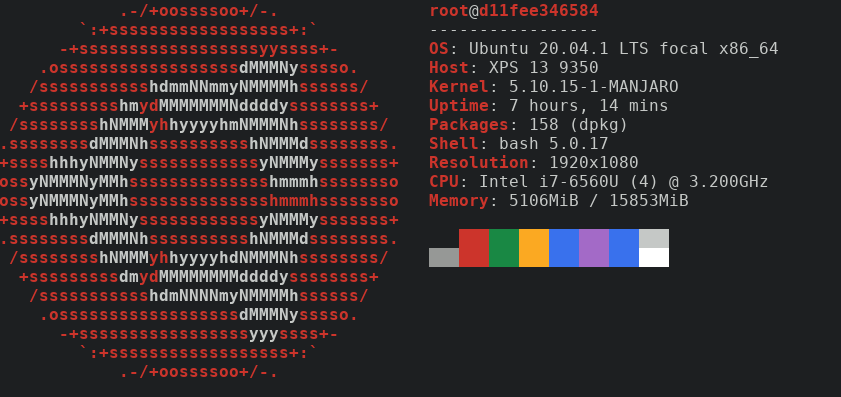
Figure 1: Neofetch on Ubuntu
neofetch is installed in that container, because the image has it.
We can also build an image based on something else, maybe Fedora ?
I looked in Dockerhub (Fedora) and found the following image.
FROM fedora:32

RUN dnf install -y neofetch
We can duplicate what we did before real quick. Save file, run command to build the image.
podman build -t neofetch-fedora:20.04 -f Dockerfile.fedora .
Then, run the container.
podman run -it neofetch-fedora:20.04 neofetch
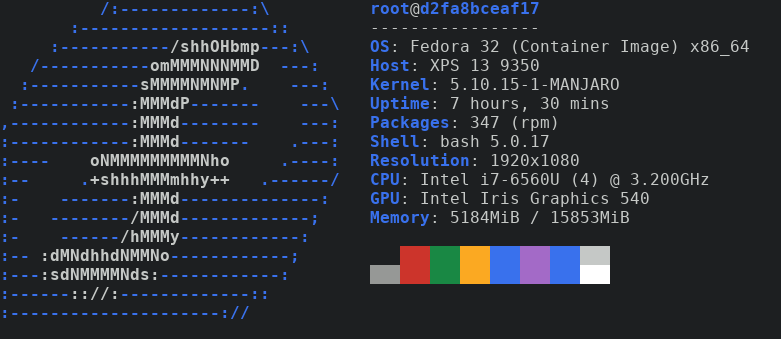
Figure 2: Neofetch on Fedora
Conclusion
Finally thought before I let you go. You may have noticed that I used Podman instead of Docker. In these examples, both commands should be interchangeable.
Remember kids, containers are cool! They can be used for a wide variety of things. They are great at many things and with the help of container orchestration platforms, they can scale better than ever. They are also very bad at certain things. Be careful where to use them, how to use and when to use them. Stay safe and mainly have fun!